Knight Emperor
꺾이지 않는 투지로 자신의 목표를 향해가는 엘리오스의 검
누나와의 압도적인 힘의 차이를 느끼고 주눅들었던 엘소드. 하지만 자신을 위해 몸 사리지 않고 손을 뻗어준 동료들의 소중함을 깨닫고, 그들이 믿는 자신을 믿기로 한다. 이제는 누나를 쫓는 그림자가 아니라, 스스로 찾은 미래로 모두와 함께 나아가기 위해.


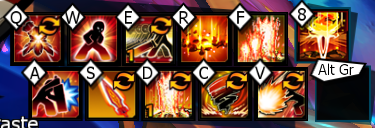
Skills
Force Passives
Skill Details
Skill Details
Skill Details
Skill Details
Skill Details
Skill Details
Skill Details
Skill Details
Skill Details
Skill Details
Skill Details
Force Abilities
Skill Details
Skill Details
Skill Details
Skill Details
Skill Details
Skill Details
Skill Details
Skill Details
Skill Details
Skill Details
Skill Details
Skill Details
Skill Details
Skill Details
Skill Details
Mod Skills
Skill Details
Skill Details
Skill Details
Skill Details
Skill Details
Skill Details
Skill Details
Skill Details
Skill Details

Knight Emperor Guide
by Dayen
Last update: May 30, 2026, 9:38 PM
Overview
Knight Emperor is a strong DPS class with good debuffs who also provides Damage Reduction to the team (useful especially if timed wisely.) He is easy to learn and play, but a proper gameplay needs a debuffer mindset. To play the main character properly, you should put yourself in his shoes as the leader of the El Search Party. This means that you should prioritize debuffing your enemies and using Iron Body for the team in case of a foreseeing danger.
Pros:
Easy to use, versatile physical DPS
Very strong on small bosses like Queen’s Throne Hall, but still good on bigger ones like Nightmare: Reset Room
Cons:
Needs high ERP with maxed Cooldown Reduction (CDR)
Needs The Setting Sun title used regularly or a party with good and constant CDR or Cooldown Acceleration (CDA) (example: 1.3 from Immortal and 1.25 from Dius Aer)
Skill bar for small bossing/general:
 Swap Grand Cross with Triple Geyser if the boss is very large/long or prioritize it if you are able to stand inside the boss (or between the possible hit spots, e.g. 20-5 p1, 21-1 p1 groggy, or similar.)
For EXP/clearing, use the Giant Hand Elixir, as well as Giant Apple and slot Vertical Slash into your bar. The skill's hitbox enlarges with the elixir along with Armageddon Blade.
Flex slots:
Counter Attack is mainly/only useful if you are using the Exascale set.
[Mod] Flame Geyser: Knight’s Will and/or [Mod] Sandstorm could be considered flex too. In general, [Mod] Flame Geyser is not needed. If you don’t have a spare Mod (E) book, you may as well use another skill.
Other possible skills:
Mortal Blow (Lv. 25, Tenacity)
Mod Windmill (Lv. 45, Strength)
Vertical Slash (Lv. 50, Strength), but has a long casting time
If you are going to play Berthe Challenge Mode (specifically Altar of Invocation), I do not recommend using Mortal Blow, as it would be the only Tenacity skill in your bar. Otherwise, you can easily take the Tenacity skill ban and DPS freely without paying attention to the ban.
Skill rotation:
Armageddon Blade
Armor Break
Grand Cross
Double Slash
Triple Geyser
Repeat OR use filler skills ([Mod] Unlimited Blade: Growing Fortitude > [Mod] Flame Geyser: Knight’s Will > [Mod] Sandstorm) OR continue spamming your main skills if debuffs are still active/no cleanse has occurred.
Depending on the available cooldown reduction in your party, you will have to adjust your rotation accordingly by using less filler skills. Strongly consider using The Setting Sun for a cooldown reset if the three main skills (Double Slash, Grand Cross, Triple Geyser) are on cooldown. Knight Emperor appreciates cooldown reduction a lot, and you will suffer without a proper skill rotation. 1.3 CDA or equivalent (e.g. from Immortal) is the bare minimum, but the more of them, the better his DPS gets.
Consider fully charging Grand Cross. Although the casting animation is very long, other skill cooldowns are relatively high. If you're casting Grand Cross only for its debuff while your main skills are still on cooldown, you will be stuck spamming fillers, dealing less damage than a fully charged Grand Cross. However, if your cooldown reduction from the team is plenty, making you able to rotate your main skills seamlessly, skip fully charging. This can also be done when the DPS window is short or the boss is small, so it ultimately depends on the environment.
However, fully charging Grand Cross will give you some easy stacks of your Lv. 99 passive when entering the dungeon or after a pattern.
Side note 1: Armor break and fully charged Grand Cross are perfect for each other. Armor Break’s debuff lasts 14s, a fully charged Grand Cross takes roughly 4s and its debuff lasts 10s. If you cast Armor Break before fully charging Grand Cross, you will have both debuffs active for ~10s before having to cast both again in the same order. Because of this, you memorize to cast Armor Break and Grand Cross one after another.
Side note 2: During patterns that take some time, you can spam Counter Attack to keep up your Lv. 60 passive (max. 10 stacks, each stack increases Attack).
TLDR:
Equip The Setting Sun in Title Quick Slot.
Fully charge Grand Cross unless swarmed with cooldown reduction.
Use Armor Break before Grand Cross for easier debuff uptime management.
Use Counter Attack during patterns.
Positioning:
Grand Cross - as close as possible (the further away you go, the less damage it deals)
Double Slash, Triple Geyser, [Mod] Unlimited Blade: Growing Fortitude - quite far away if the boss is small (Double Slash will hit better if positioned properly and Triple Geyser will hit with one more Geyser; [Mod] Unlimited Blade’s damage also benefits from this)
Armor Break - the range is a bit bigger if your character is looking away from the enemy.
Regarding Double Slash, Triple Geyser:
Considering the amount of time you would spend to position every skill, the reward is more or less reasonable. Skills make you dash forward, nullifying your efforts, and it may not improve the overall DPS. Speed buffers only make this worse, as your aim becomes less precise. During Green Exascale’s ‘Complete’ effect, positioning for every skill cast is not recommended, although there might be exceptions (Wilting Tower: Flight Stage 1).
In general, repositioning yourself will result in more damage, but you may need some practice to get used to it. An example for a nice skill chain would be:
Dash+Z or other preferred repositioning means (get distance from the enemy)
[Mod] Unlimited Blade: Growing Fortitude (more skill damage from staying a little bit away)
Double Slash (giving you a little step forwards but still giving the skill hits)
Triple Geysir (brings you close to the enemy, better hits)
Grand Cross (gets better damage output for the skill if you want to fully charge it as you stand right close to the enemy)
Check this gif to see where to stand in order to maximize Double Slash’s damage.
Accessory Recommendation
Antenna Earring (only if using Exascale):
Knight Emperor can easily restack Exascale effects with Counter Attack. With a bit of practice, you can restack your buff a minimum of 12 times outside of damage windows.Maestro Halo:
Considering that you should permanently spam [Mod] Armor Break, the Combo/Active skill condition of this accessory will always be fulfilled and you only need to pay attention to Awakening activation for a free damage increase (unlike Soul Crown, which is permanent during Awakening).
Socket/Stat Recommendations
Critical/Maximize recommendation (-30% Crit Debuff)
Critical - 88.77%
Maximize - 68.28%
Consider socketing Action Speed if you’re below 120% to 124%. The lower range is fine if you have a speed buffer in your team.
MP Usage Decrease is irrelevant.
Max out your Cooldown Reduction stats (35%). Knight Emperor significantly benefits from reducing his cooldowns, and will suffer when that is not supplied.
Exascale Color Recommendation
Red and Cont. Damage Top is preferred. All things considered, it is too much of a damage loss. After all, you will need cooldown reduction supports in your team either way, and resets are not guaranteed to hit.
Atma’Ram Accessory Type Recommendation
Atma of Flow is recommended, as it provides frequent cooldown reduction. Pay attention to keep up the item usage buff for more attack.
If you have a good cooldown management with The Setting Sun (Title) and good cooldown acceleration buffers, you may also use Atma of Grove or Atma of Flame, if you dont have a proper Atma of Flow set. But Atma of Flow would still be superior in damage.
Relevant for patch (KR): 2025-05-22
Newer balances might have not been considered.
Written: 2025-12-27
Last information update: 2026-05-30
If you noticed a mistake or disagree with something in this guide, DM me on Discord: @phantomdance