Rune Master
엘의 힘을 활용해 자신만의 룬 검술을 구축한 최강의 마검사
엘과의 직접적인 접촉으로 인해 갑작스럽게 활성화된 엘소드의 마나는 시간이 지날수록 점점 제어하기 힘든 수준에 이른다. 엘소드는 이 힘을 억누르지 않고 밖으로 꺼내기로 결심한다. 전신과 검 끝으로 퍼져나간 폭발적인 마나는, 엘소드를 어떤 마검사도 도달하지 못한 경지로 이끈다.


Skills
Force Passives
Skill Details
Skill Details
Skill Details
Skill Details
Skill Details
Skill Details
Skill Details
Skill Details
Skill Details
Skill Details
Skill Details
Force Abilities
Skill Details
Skill Details
Skill Details
Skill Details
Skill Details
Skill Details
Skill Details
Skill Details
Skill Details
Skill Details
Skill Details
Skill Details
Skill Details
Skill Details
Skill Details
Mod Skills
Skill Details
Skill Details
Skill Details
Skill Details
Skill Details
Skill Details
Skill Details
Skill Details
Skill Details

Rune Master Guide
by Alxeth
Last update: May 20, 2026, 9:27 AM
Overview
Rune Master (RM) is a Magical Synergy DPS. Thanks to his quick skill rotation with versatile DPS skills, he deals consistent damage to bosses regardless of their size, while specializing in taller and longer bosses. He supports the team with high damage amplification while also shredding enemies’ resistances.
Pros
Great magical synergy paired with high damage potential.
Stable rotation, independent of Cooldown buffers (which doesn’t mean they are to be neglected, since they will accelerate your rotation’s speed even further).
Quick casting speed throughout his whole kit (if provided with enough Action Speed).
Easy to pick up and perform decently right away.
Cons
Small bosses can be tricky to DPS efficiently.
Can be very mana-hungry due to his hasty rotations and quick animations.
In need of high base Action Speed (124%+ minimum) paired with speed buffers and a 3k point pets encouragement buff — he feels clunky otherwise.
Difficult to master, very powerful when played at a high level.
Skill Build
In the following skill builds, Fire Rune can be interchanged with [Mod] Flame Geyser: Radiant Blaze if preferred. Fire Rune helps with quick rotations, while [Mod] Flame Geyser deals nice damage against bigger bosses and has a more consistent burn application if the boss moves a lot.
The same applies to Triple Geyser and [Mod] Extreme Rune Buster (ERB).
Triple Geyser has a faster cast time and higher total damage, but can be annoying to use because it repositions you. ERB’s damage is more consistent on very small bosses, but it is significantly slower to use than Triple Geyser.
I will refer to [Mod] Unlimited Blade: Burst Saber only as Burst Saber and to [Mod] Flame Geyser: Radiant Blaze only as [Mod] Flame Geyser in the following sections.
The ideal skill bar depends on the content you are playing and your personal preference. You will need to experiment with your build to adjust to the dungeon for the best possible performance.
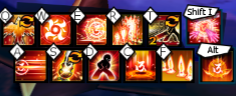
This is the main skill bar, focused on rapid rotations with the help of Enchant Dash’s instantaneous cast time. Enchant Dash’s repositioning can be annoying, so it can be swapped with any other Rune Skill if preferred.
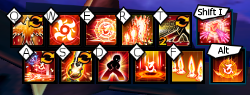
Effective against very small bosses by using both [Mod] ERB and Triple Geyser. When dealing with small enemies, Luna Blade will outperform Lodestar in terms of damage, but will slow down the rotation. Triple Geyser can work on the F slot as well.
Important Passives
Thinking Outside The Box (level 15): You deal 8% increased damage against Burning enemies, so make sure to keep up Fire Rune’s / [Mod] Flame Geyser’s Burn debuff.
Magic Proficiency (level 60): When hitting enemies, you will gain 1 stack of Critical Chance/Critical Damage, up to 5 stacks. This effect can activate once per second. Before starting your burst, make sure to reach the maximum stacks for maximum damage. Since the stacks only last for 5 seconds, don’t forget to constantly hit the boss (or any other hittable object) even outside of DPS windows to speed up your DPS setup.
New Heights (level 99): When using a Rune Skill, all Special Active Skill Cooldowns will be reduced by 3 seconds. This is your main passive that defines your rotation.
Skill Rotation
While dealing damage, you have three different things to keep track of.
[Mod] Critical Sword grants you a 30% Critical Damage Increase for 26 seconds. Make sure this buff is always active.
[Mod] Phoenix talon grants you 50% Defense Ignore on all skills, which is crucial for your damage output. The buff is applied for only 20 seconds, so use the skill consistently. Also, Phoenix Talon’s damage is often underestimated, so don’t write it off as just a buff skill.
Make sure that the boss is Burning at all times. Sometimes other status ailments can overwrite Burn visually, so be sure that the boss is being hit by either Fire Rune or [Mod] Flame Geyser.
Your rotation will start like this:
Fire Rune/[Mod] Flame Geyser instantly for constant attacking to quickly stack Magic Proficiency and set the boss ablaze
[Mod] Critical Sword
Rune Field
[Mod] Phoenix Talon
Fire Rune/[Mod] Flame Geyser to reapply Burn on the boss (At this point, you should have your 5 stacks of Magic Proficiency; if not, throw a Wind Orb for more party synergy)
Rising Slash
Burst Saber
Triple Geyser
From this point on, you will use your Rune skills (Lodestar, Fire Rune, Rune Field, [Mod] Flame Geyser, [Mod] ERB) for the cooldown cuts from New Heights, so your three main skills are available as soon as possible again. Rune Master casts many skills in quick succession. To put it simply, his gameplay looks like the following:
buffing→ DPS skills → quick-cast filler Rune skills for CD cut → DPS skills → quick-cast filler Rune skills for CD cut → DPS skills → repeat
General DPS Tips
Since [Mod] Critical Sword’s buff duration is 6 seconds longer than [Mod] Phoenix Talon, always time using [Mod] Critical Sword before Phoenix to reactivate their buffs without getting into an awkward situation where one buff is up but the other isn’t.
Prioritize standard skills before Rune skills. By using your standard skills first (Rising Slash, Triple Geyser), the Rune skills used afterward will decrease their cooldowns. This keeps your rotation quick and smooth.
Depending on the boss’s size, you want to use your green Exascale burst with Rising Slash or Burst Saber. The general rule of thumb is that if you hit 4 blades of Rising Slash, it will perform almost equally as Burst Saber, since Rising Slash’s cast time is a lot quicker. If it’s 4+ blades of Rising Slash, it should generally outperform Burst Saber. If it’s less than 4 Rising Slash blades, Burst Saber is generally more optimal.
Take this with a grain of salt because it can vary heavily depending on the boss, its movement, groggy design, and some other factors. In certain scenarios where both Burst Saber and Rising Slash don’t hit well, even Triple Geyser can be the the most optimal skill to use in green Exascale buff.
(All of this applies to double casting skills with the 15-6 title [Night Parade of the White-Ghost] as well.)Against small bosses, try to position in a way that Rising Slash will hit at least 2 blades.
Exascale
For Rune Master Red Exascale with Continuous Damage is recommended.
Rune Master has a very powerful Cooldown passive, which makes the Reset Chance and Cooldown Acceleration of Blue Exascale less impactful.
Blue Exascale with reset can be very fun because of Rune Master’s rapid casting speed, but it will almost always be outperformed by Red with Continuous Damage.
Relevant for patch (KR): 2025-10-23
Newer balances might have not been considered.
For further questions you can ask me on Discord @Alxeth